Thursday, December 13, 2012

December Daily - Days 9 and 10

 This is of my sweetie Maltese Zoey in her new Christmas outfit - she is not impressed! LOL

 I found some old Jenni Bowlin journal stickers for the journaling - I wish I had several more sheets of these!


 My album is getting so fat, it's just easier to take photos of my pages not in the album! I'm just a chunky scrapper...LOL!

 For this title, I used a cut from the Cut it Out class that I took from Studio Calico. Those cupcakes were awesome - just very bad for my diet!! :P

Thanks so much for stopping by!! Have a wonderful day!!

Sunday, December 9, 2012

December Daily - Days 6,7,and 8

Another very heavy photo laden blogpost!! :)
 
 On the 6th day, Danielle had a Jazz Band Christmas concert. Everyone was to "wear all black and then decorate" according to her band director. We got her a blinking red nose and antlers - and she was the hit of the concert - especially when they played Rudolph the Red nosed Reindeer and she lit her ears and nose up!! It really helped that she sits right up in the front and center!

 I recently bought some Crate Paper - Sleigh Ride embellies and paper and they go perfectly with the color scheme I am working with.

 I cut the title piece on the transparency with my Silhouette Cameo and used some AC Pow paper in silver.
 I just love those wood veneer letters - I wish I had 50 of each letter!!

Day 7 - My cute golden retriever was oh so patient to let me put the antlers on him and take his picture. He really loves the excitement of the holidays with everyone home and visiting so I had to make sure he a  place in my album


 The little deer and wreath flair is one of the buttons I snagged at JC Penney!! I visited them again the other day and got 9 more - only a couple are doubles (I have two turkey legs...what am I going to do with those? Let's see if they end up in my album :)!).


 I used the wood veneer letters for his name after inking them.

Day - 7 - Documenting our neighbor's beautiful holiday light display. I haven't even captured the amount of lights they have in my  photo - that is just a fraction of what's in their yard!

 I made the middle divider using a spare photo protector that I had from last year. I cut the size that I wanted, leaving the edge for the holes and filled it with some confetti, sequin stars and a couple of pieces of ephemera. After sewing all around the open edges, I wrapped the end in washi tape (covering the old holes that weren't the right size) and then punched the holes in the correct spots.

 I got those cute 3-d Christmas light stickers at Michaels yesterday - they were clearanced - score!!


Using my tiny attacher, I stapled some of the star sequins around my pages. I've used up almost all of my tiny silver tinsel - I need to find some more tomorrow somewhere!! Wish me luck finding some!! I love that stuff!!

If you made it all the way to the end - thanks for hanging in there!! Hopefully I can stay caught up!! :) Have a great day and thanks for stopping by!! :)

Thursday, December 6, 2012

December Daily - Day 5

 I am so sorry for the awful photos today - it's a gray and dreary day and I've spent half the day at the dentist getting a root canal - not as bad as it sounds. My tooth was hurting so very very badly before I went in, and now it doesn't hurt at all!

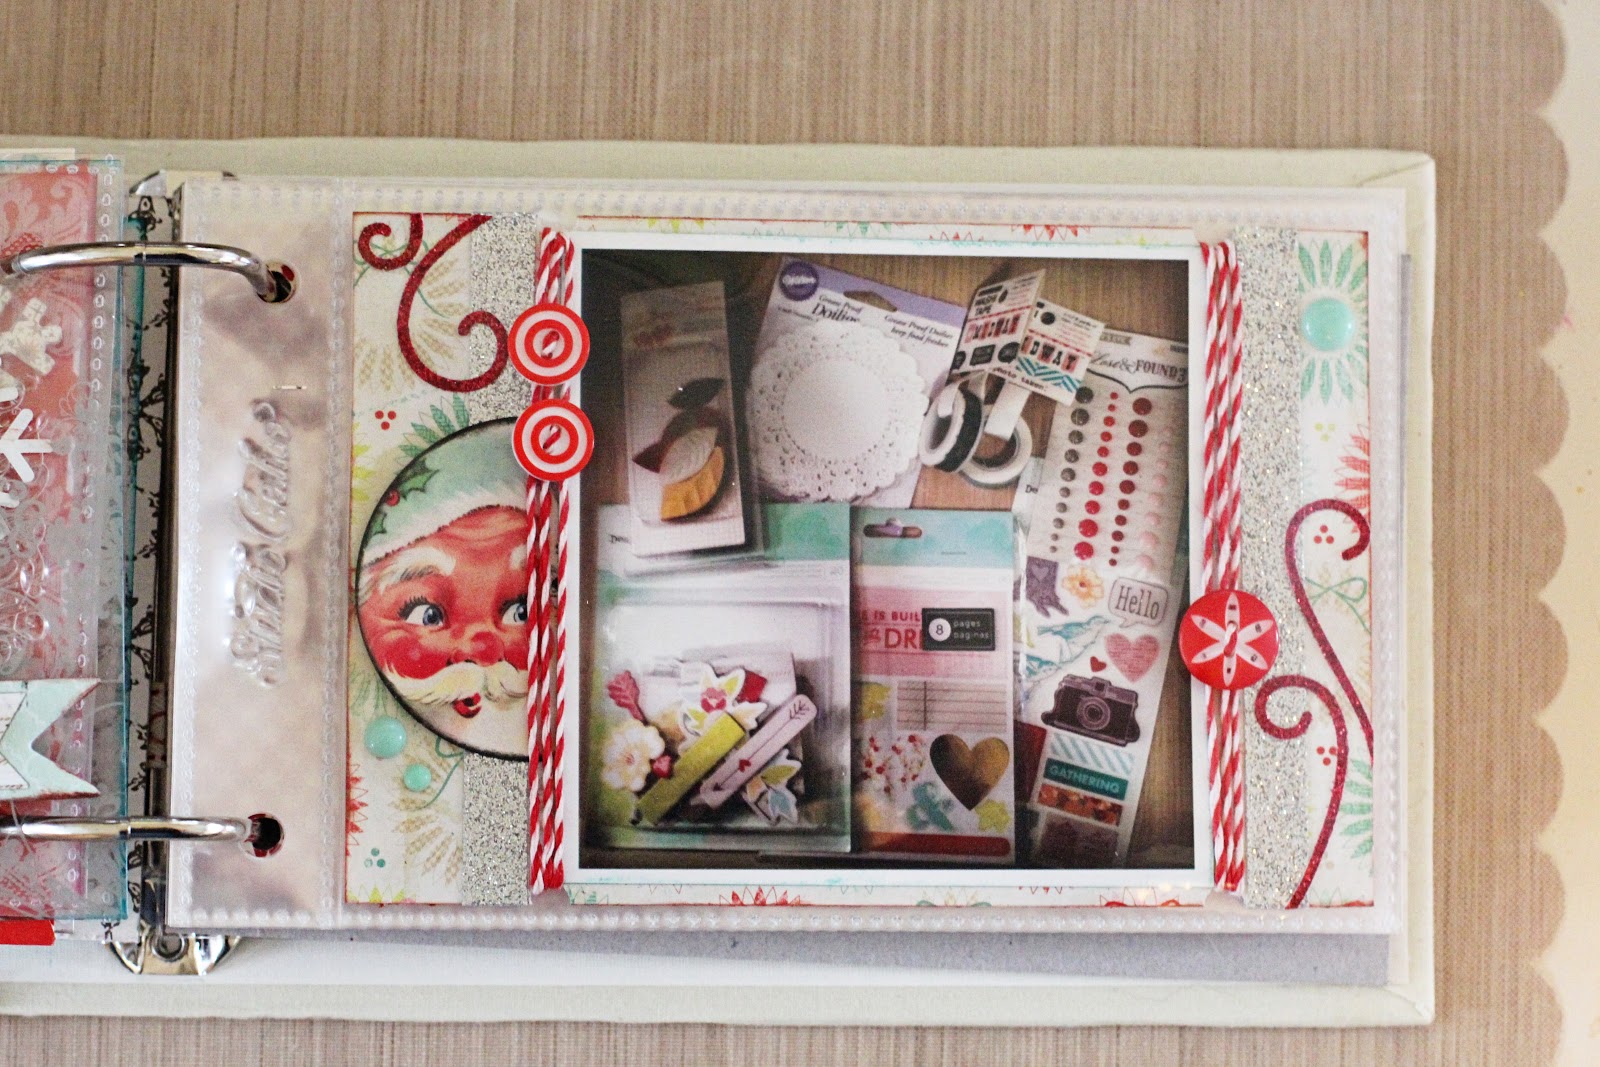
My entry yesterday was documenting the package that I received from my Secret Santa - an exchange I participated in on the Studio Calico forums. Let's just say - I was very very spoiled by my Secret Santa!! :)  I also received some scrappy goodness that I ordered from SC as well as my monthly kit and I used some of my new goodies on my album - some Crate Paper Sleigh Ride items. I love that line so much - it has perfect aqua in it!!


 I used some older KI Memories title stickers for the "Santa" in my title - I wish i had ten packs of those glitter stickers - they are actually 12" long and I love to cut them apart and use the swirls and curlicues separately (which I did on the photo page).

 
On my photo page, I cut notches at the spot that I wrapped around the twine so it wouldn't stick up past the page and distort the page protector (I got that idea from Maggie Holmes!). I just took a hole punch and cut half circles on both sides. I also threaded some buttons through the twine - it took some work but I like the look!

Thanks for looking and I hope you have a fabulous day!! :)

Wednesday, December 5, 2012

December Daily - Days 3 & 4

 
 Just warning you now - there are lots of pics in this post!! I missed posting yesterday so there's a double post today! If I don't keep up with my pages I'll be too far behind to ever catch up!

Day 3 showcases a couple of "new" vintage decorations that I found at some local antique shops recently. I pulled them out to get them ready for display.

 
 The journaling is in the back pocket of the sewn photo sleeve with the confetti showing through down the sides - so glad I found that double sided confetti at Hobby Lobby (in the Christmas craft section). The red doilies (Jenni Bowlin from my DD stash from last year) are actually sitting on top of the photo sleeve - they were too bulky inside it! The star pin is by Maya Road.

 
 I cut the diecut on my Silhouette Cameo, with a cut from the Studio Calico DD class and some American Crafts silver POW paper.

 
 I wanted to give my transparency divider a vintage look, so I put some tinsel garland down one side (attached with a Tiny Attacher). I wanted to edge the rest of it in silver, but I didn't have any silver Stazon, so I used some silver spray paint instead! I sprayed a glob of paint onto a scrap piece of plastic wrapper and rubbed the edges through the paint. It was quick and easy!


 Day 4  - Danielle and I picked up an angel off of the Angel Christmas Tree at our local Wal-Mart today. We do this every year and we always look forward to choosing just the right child and then shopping for them! I used our actual Angel that we chose from the tree as an embellishment/photo since I didn't get a photo of us or the Angel tree while we were in the store!

 
 Since I had the back of the envelope to work with, and it was VERY red, I wanted to incorporate lots of pink and blue emellishments onto it to balance the Angel side. Inside the envelope is the actual list of the presents we are going to buy and on the back of it is some journaling.

 
 I didn't like the inside look of the envelope (it was red and white striped, so I lined it with a blue paper that matched the right half and then attached a doily which I first sprayed with SC Mister huey's in silver and Blizzard.


 I heat embossed several of the wood veneer snowflakes and stars with white Zing (American Crafts) to layer around my pages.

 
 I added some tinsel ribbon to accentuate the Angel's halo. I rolled her up so she would fit on the page!
 
Thank you so much for stopping by today!! Have a wonderful day!! :)

Monday, December 3, 2012

December Daily - Day 2

 Day two - Danielle and I went shopping at the mall. But we really weren't going Christmas shopping, Danielle needed some winter clothes and I "needed" a couple of shirts that were on a great sale and some new eye shadow from Sephora. I did get one gift for my son so it wasn't a complete bust!! I also got a lot of ideas for others. :) I also collected several flair buttons from JC Penney. They are giving them away at all the registers to win a prize, but I just want them for my DD!! I used two of them on this spread!! I did purchase some things and they did give me a couple there - but I just went up to one guy that worked there and asked for one and he gave me a handful!! Score!!


 I am using my new Studio Calico roller stamp to stamp the dates on the backside of the transparencies. I should be getting the new American Crafts Christmas roller stamp soon and I can't wait to start using that one also!

 
For the photo page, I sewed down both sides of the photo and filled the sides with some confetti (purchased at Hobby Lobby). I made a slit across the top of the page so that I can slide in a photo or journaling on the back side of the page for day 3.

Thanks for looking!! Hope everyone has a great day!! :)

Sunday, December 2, 2012

December Daily - Cover, Title Page and Day 1

I am using the Studio Calico December Daily kit, plus some things from my stash, to make this mini album this year. The album is smaller than I'm used to, but I think I will actually be able to complete it this year instead of stopping in the middle of the month (like I did last year) because it got so overwhelming!

For the cover, I covered the spine using washi tape, then added a glitter ribbon layer, a twine layer, and a doily on the front. I stamped the December on the front of the book (which is linen) and then attached the 2012 flair piece and some veneer stars which I spritzed with some silver Maya Road mist. I then added a punched snowflake to the front and spine using the American Crafts POW silver paper.


 For the title page, I stamped across a piece of ribbon (removed from an Anthropologie bag) using a TT stamp from the SC DD kit and then sewed it across a piece of transparency. I also sewed on a star (older stash products - these were made by Jillibean Soup) on both sides of the transparency. Under the transparency is a chipboard page covered in a piece of patterned paper from the Studio Calico Wonderland collection. I layered some Thickers on top of a doily and then sewed across the letters to ensure they would stay on!


For my December 1 page, I used a piece of October Afternoon patterned paper that I had from last year from an 8x8 pad for the base of my spread. I don't even remember the name of the line, but it has the same vintage color scheme that I'm going for this year. I actually used some pink to start off my pages - it just seemed to go so well with the sunset in the photo of the lights that are hanging on the poles in our downtown area. I printed my photo out using my Selphy (which I'll probably use for just about every photo) - I love that I finally figured out how to print out my Instagram photos correctly!! :)
Throughout my album, I plan on using one side for journaling and the other side for the photo. I used a small piece of transparency to divide the two sides so I could have a place to house the date and a few extra embellishments. I used some Stazon around the edges of the transparency to give a bit of definition. I heat embossed a few stars using silver Zing to scatter in places and I also cut out a title using my Silhouette Cameo. The cut is from a DD class that I am taking with Studio Calico. I used some Stazon around the edges of the transparency to give a bit of definition. I used a few of the printables that were designed exclusively for the Studio Calico class for my journaling.

Hopefully I can stay on track and get this mini done this year!! :)

Thanks for stopping by!! :)